


Product Care Guide
Lacing your Glove in 5 Simple Steps
Fix broken laces and give your favorite glove new life with this easy relacing guide
Last updated: 21 January 2026 | 4 min read

A worn or broken lace doesn’t mean your glove is finished. Relacing a baseball or softball glove might seem tricky at first, but with the right tools and a little patience, anyone can do it—whether you're a player, parent, or coach. Over time, laces stretch, tear, or wear down, which can affect your glove’s shape, performance, and safety. Instead of buying a new glove, relacing it helps restore its structure and extend its lifespan. In this step-by-step guide, we’ll show you how to relace your glove, what tools you’ll need, and how to bring your favorite glove back to game-ready condition.
When is it time to buy a new glove?
Relacing can extend the life of your glove, but sometimes, it’s just time for a replacement. If the glove is too small, badly worn, has cracked leather, or has lost its shape and structure, it won’t perform well—no matter how well it’s relaced. Growing players, position changes, or a higher level of play can also mean it’s time to upgrade to a properly fitting, game-ready glove.
What You Need
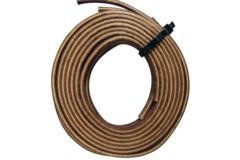
- Laces: Standard glove laces are typically 72 inches long. Most gloves require 3 to 4 laces, but larger models like trapeze, modified trapeze, catcher’s mitts, or first base mitts may need up to 6.
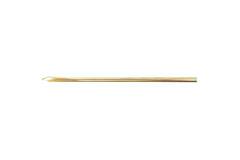
- Lacing Needle: Use a U-wire or straight-groove lacing needle to thread the lace through the glove holes.
- Glove Conditioner: Helps soften the leather, making it easier to work with and extending the glove’s lifespan.
- Knife or Scissors: For trimming laces to the correct length.
- Pliers: Useful for pulling laces through tight holes and removing old, stuck laces.
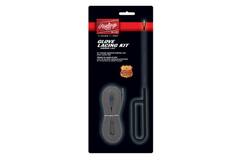
Need laces, conditioner, or relacing tools? Check out our Glove Maintenance Collection to get everything you need in one place. Or check our products below.

Glove Repair & Care Must-Haves
21.95
In stock
Save 17%
60.9550.50
In stock
Step 1: Prep Your Glove
- Film or photograph the glove before removing the laces.This helps you follow the original pattern correctly.
- Clean the glove: Use a soft cloth or brush to remove dirt and debris. This prevents grit from damaging your new laces.
- Apply glove conditioner: Lightly rub conditioner into the leather—especially between the fingers and on the inside. This softens the glove and makes relacing easier.Rub a little conditioner onto the new laces to soften them. This helps with easier threading and is gentler on your fingers. Avoid overapplying.
- If you're new: relace one section at a time instead of stripping the whole glove. It’s easier to stay on track.
Step 2: Remove the Old Laces
- Cut the old laces: Use sharp scissors or leather shears to carefully cut the old laces. Start with the parts that are the most damaged.
- Pull out the laces: Use pliers to remove the laces from the holes. Pull gently to avoid damaging the leather.
- Check the lace holes: Look closely at each hole in the glove. If any holes look stretched, torn, or damaged, you may need to repair or reinforce them before adding new laces.
Step 3: Start Relacing the Glove
- Begin at the wrist area: Start threading the lace through the holes at the wrist opening of the glove. This is usually the easiest section to relace and helps you get used to the process.
- Follow the original lace path: Use photos or video (if you took them) to follow the same lace pattern your glove had before. Always go one hole at a time to avoid mistakes.
- Keep the lace tight: Pull the lace snug after each hole to maintain strong structure and shape. Don’t leave any sections too loose or too tight.
- Use pliers if needed: If a hole is tight or hard to reach, carefully use pliers to pull the needle through. Be gentle to avoid damaging the leather or the lace.
- Smooth side out: Make sure the smooth side of the leather lace is facing outward on the glove for the best appearance and durability.
- Pull lace tight, but don't deform the glove.
Step 4: Secure the Laces
- Finish each section with a tight knot: Once you’ve laced one full section (like the webbing or palm), tie a firm overhand knot at the end of the lace. This keeps the lacing from slipping or loosening during play.
- Use pliers for extra grip: Gently pull the knot tight using pliers to make sure it’s secure. A tight knot helps the glove keep its shape and structure.
- Leave a bit of extra lace: After tying the knot, trim the lace but don’t cut it too short. Leaving a small tail (about 1–2 cm) gives you the option to re-tie it later if the knot loosens over time.
- Double-check for tightness: Before moving on to the next section, gently pull on the lace to confirm the knot holds. This will save you time from having to redo the same section later.
Step 5: Final Touches
- Apply glove conditioner: Condition the glove and laces again. Don’t use too much — a light coat is enough.
- Shape the glove properly: Place a baseball or softball in the pocket of the glove and close the glove around it. Then wrap it tightly using string, a glove wrap, or even an old belt. This helps shape the glove to your preferred fit and create a nice, deep pocket.
- Break it in with use: The best way to finish the break-in process is simply to use the glove. Play catch, take ground balls, and use it during practice. This will naturally soften the glove and help it feel game-ready again.
Glove Buying Guides

Gloves
Your Quick Guide to Choosing the Right Baseball Catcher’s Glove
A catchers glove has other features than a normal glove. So when buying a new baseball catchers glove it's good to know everything there is to know about it. This guide will help you learn more about the glove like the materials, sizes and webbing.
Gloves
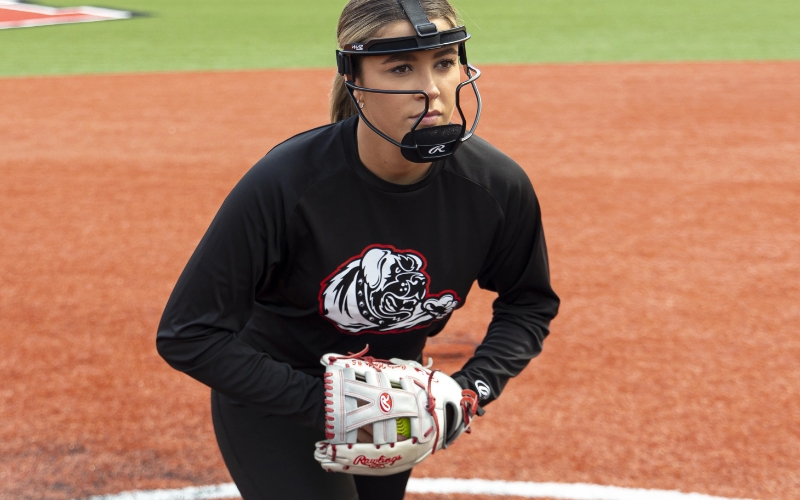
Glove Types for Softball Pitchers
Pitching in softball is about control, focus, and technique. But even the best pitchers need the right glove to perform at their best. Softball pitchers use gloves with specific features—designed to hide the ball, offer support, and help with quick, powerful plays.

Gloves
Buying Your First Baseball Glove? Here's What You Need To Know
Are going to buy your first baseball glove? It's good to know everything about it so you get the right glove for your needs. After reading this guide you'll know more about the features of a baseball glove like the webbing, materials or the different positions.

Gloves
What to Know Before Choosing Your Outfielder’s Glove
Is your old baseball glove worn out or are you switching positions from infield to outfield? Choosing the right glove can make a big difference in your defensive performance—helping you field cleanly, react faster, and contribute to those game-winning plays. This outfielder’s glove buying guide covers everything you need to know about the key features to look for, including webbing, padding, and glove length.

Gloves
How to Choose the Best Baseball Glove for Pitchers
Whether you're just getting started or leveling up your gear, choosing the right pitcher’s glove is essential. A pitcher's glove is more than a piece of gear – it's part of your game plan. A well-chosen glove allows you to:

Gloves
3 Simple Steps to Choose the Right Baseball Infielder’s Glove
If you’re thinking about buying a new baseball glove, it’s important to understand the key features that make a glove ideal for your position. This infield glove buying guide will help you choose the best baseball glove, making it easier to find the perfect fit for your infield needs.
Gloves
Softball Outfield Gloves: Buying Tips
Do you need a new softball glove because your old one is worn out? Or have you recently switched from infield to outfield? Choosing the right glove can improve your defense and boost your team's chances of winning. Whether you're shopping for a slowpitch softball glove or a fastpitch softball glove, it’s important to know what features to look for. This guide will explain the key differences and help you choose the best outfield glove for your game.

Gloves
How to Choose Your Softball Catcher's Mitt?
A catchers glove has other features than a normal glove. So when buying a new softball catchers glove it's good to know everything there is to know about it. Do you need a new fastpitch catcher's mitt or a slowpitch catcher's mitt? This guide will help you learn more about the glove like the materials, sizes and webbing.

Gloves
Best First Base Mitts for Baseball and Softball
First Basemen might be the most involved position players on the field. They have to catch the receiving throws from other infield players, catching attempts of a pickoff from pitchers and they have to field their position. This asks a lot from a player and even more from their glove. First base gloves look different compared to regular gloves you spot on the field. But remember that they didn’t create the glove for the looks, but with a function. First Base gloves are also called mitts.

Gloves
Here’s How to Choose the Right Softball Glove for Infielders
If you're thinking about buying a new softball glove, it's important to understand the key features that make a glove suitable for your position. Whether you're shopping for a slowpitch or fastpitch glove, knowing what to look for will help you make a smart choice.